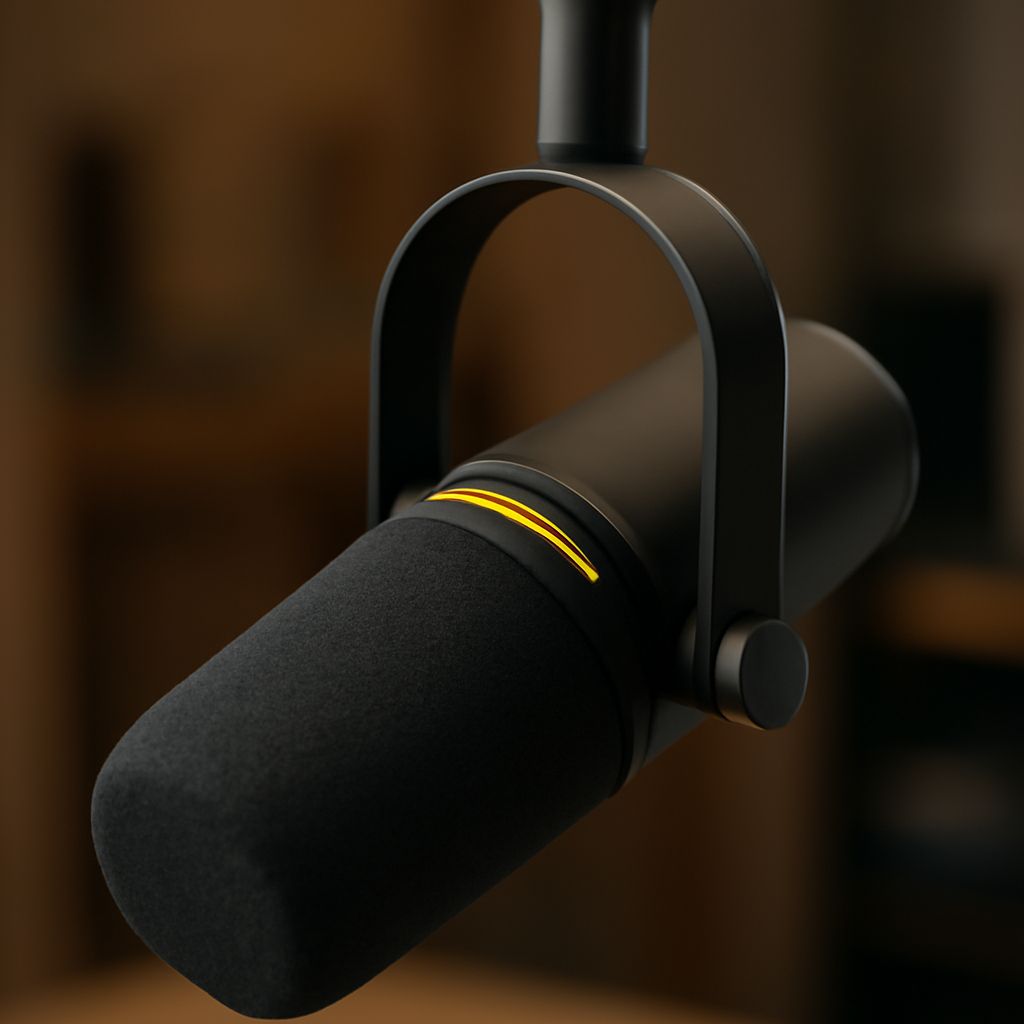
The best microphone depends on the complete setup, not one universal ranking. For streaming in an untreated or noisy room, choose the Shure MV7 or the budget Samson Q2U: both are dynamic microphones that work over USB and XLR and reject more room sound when used close to the mouth. For a quiet room and simple USB workflow, the Elgato Wave:3 is an excellent condenser option.
For vocal recording, the RØDE NT1 is the strongest all-round studio choice for a reasonably quiet room, while the Audio-Technica AT2020 offers a lower-cost entry to condenser recording. A dynamic microphone such as the Shure SM58 or MV7 is usually easier to control in an untreated room. The sections below compare connection type, pickup pattern, room sensitivity, self-noise, monitoring, interface requirements, and total setup cost.
Choose the best USB microphone for streaming: MV7, Wave:3, and budget picks by room
For most streamers, the best USB microphone is the one that makes clear speech easy without requiring an interface, mixer, or extensive acoustic treatment. The three practical choices are different rather than directly interchangeable:
- Shure MV7: best for close-up speech, untreated rooms, background noise, and a setup that may later move to XLR.
- Elgato Wave:3: best for a quiet or moderately controlled room when you want a detailed condenser sound and straightforward USB monitoring.
- Samson Q2U: best budget USB microphone for speech when you want dynamic room rejection and a backup XLR connection.
Shure MV7: the most flexible streaming setup
The MV7 is a dynamic microphone with both USB and XLR outputs. That combination makes it especially useful for streaming: connect it directly to a computer today, then move to an audio interface or mixer later without replacing the microphone. Its close-talk design also helps reduce the amount of room sound reaching the recording.
Use the MV7 about 5 to 10 cm from your mouth, slightly to one side rather than directly in front of your lips. Speaking close to the capsule gives the microphone a stronger voice signal relative to fans, keyboard noise, and reflections. Keep the microphone pointed toward your mouth and the rear of its cardioid pickup pattern toward the loudest unwanted sound where possible.
The trade-off is that a dynamic microphone needs more gain than many condenser microphones. The MV7’s USB connection supplies the required preamp and converts the signal internally, so no interface is needed in USB mode. In XLR mode, you need an interface with a clean microphone preamp. The USB version also provides headphone monitoring and software control, which is useful when you need to hear your voice and stream audio without adding a separate mixer.
Choose the MV7 when your room has hard surfaces, an active computer fan, street noise, or inconsistent background sound. It is also a good choice if streaming is the immediate goal but podcasting, voice-over, or more serious recording may follow.
Elgato Wave:3: a simple condenser for a quieter room
The Wave:3 is a USB condenser microphone. USB describes its connection; condenser describes its capsule technology. These are not opposing categories. A condenser microphone can use USB, XLR, or both, and the Wave:3 uses USB to keep the setup compact.
Compared with a close dynamic microphone, a condenser generally captures more high-frequency detail and more of the surrounding space. That can make speech sound open and articulate in a quiet room. It also means the microphone will expose reflections from a bare desk, nearby walls, and a hard floor more readily.
Place the Wave:3 roughly 10 to 20 cm from your mouth, with the capsule aimed correctly and a pop filter or windscreen between you and the microphone. Keep the gain low enough that normal speech has headroom for louder words. Its headphone output allows direct monitoring, so you can listen without the distracting delay that may occur when monitoring through computer software.
Choose the Wave:3 when you want USB convenience, a detailed spoken-word sound, and software control, and your room is quiet enough that extra sensitivity is not a problem. Do not choose it simply because condenser microphones are often described as more professional. Room fit matters more than that label.
Best budget USB microphone picks by room
The Samson Q2U is the best budget USB microphone for many first-time streamers because it combines a forgiving dynamic capsule with USB and XLR outputs. The Audio-Technica ATR2100x-USB offers a similar use case. Either microphone works best close to the mouth on a stable stand or boom arm. Both can continue serving as an XLR microphone after you add an interface.
These microphones do not capture as much room detail as a typical large-diaphragm condenser, but that is an advantage in a bedroom, office, or shared space. They still require good placement. A dynamic microphone does not make distance irrelevant: placing it 30 cm away and increasing the gain can bring room reflections and noise back into the recording.
A low-cost USB condenser such as the FIFINE K669 can be a useful alternative in a quiet room. It usually gives more immediate treble detail for less money, but its fixed USB workflow provides less upgrade flexibility than the Q2U or ATR2100x-USB. It is better suited to a controlled desk than a noisy room.
Plan on approximately $100 to $280 for a usable budget USB setup, excluding the computer. That can include a Q2U or ATR2100x-USB, closed-back headphones, and a basic stand or arm. A Wave:3 setup commonly lands around $200 to $350 with headphones and mounting hardware. An MV7 USB setup is generally closer to $270 to $450, depending on the stand and headphones.
Choose the best studio microphone for vocals: AT2020, NT1, or a dynamic mic by room and pickup pattern
The best studio microphone for vocals is usually an XLR condenser when the room is quiet and controlled, but a dynamic microphone can produce a better recording in an untreated space. Start with the room and singer rather than assuming that the most sensitive capsule will be the best option.
- Audio-Technica AT2020: an affordable cardioid condenser for home vocal recording in a reasonably quiet room.
- RØDE NT1: a low-noise condenser for detailed vocal and acoustic recording when the room is controlled.
- Shure SM58: a durable cardioid dynamic that reduces room exposure and works well for close vocal takes.
- Shure MV7: a dynamic hybrid option when you want USB now and XLR recording later.
AT2020: an affordable first condenser
The AT2020 remains a practical entry point for home vocal recording because it provides a familiar large-diaphragm condenser approach without requiring a high-end studio budget. Its cardioid pattern favors sound from the front and reduces sound arriving from the rear, although it does not eliminate side reflections or room reverberation.
In its standard XLR form, the AT2020 needs an audio interface, an XLR cable, and 48-volt phantom power. The interface powers the condenser capsule, provides the preamp gain, converts the analog signal to digital audio, and usually supplies a headphone output. The microphone itself cannot connect directly to a computer without an appropriate converter.
Use an AT2020 when your room is quiet, you can place basic absorption near the singer, and you want more detail and air than a typical dynamic microphone provides. A pop filter is important because condenser capsules can respond strongly to plosive bursts from words beginning with “p” and “b.” Leave enough distance for the singer to move naturally, but do not back away so far that the room becomes the dominant sound.
RØDE NT1: a strong choice for low-noise vocal recording
The RØDE NT1 is one of the best condenser mics for a home studio that needs a clean, detailed vocal track. Its low self-noise is useful for quiet singers, soft passages, acoustic instruments, and recordings where compression will later raise the level of subtle details. The NT1 family includes versions with different connection options, so check whether the model is XLR-only or offers both XLR and USB.
An XLR NT1 requires the same signal path as the AT2020: microphone, XLR cable, interface with phantom power, headphones, and recording software. A dual-output version can provide a direct USB path as well as an upgrade route to XLR. That does not make USB and condenser separate categories; it demonstrates how the two descriptions refer to different parts of the microphone.
The NT1 is most effective in a quiet room with controlled reflections. Its low self-noise cannot compensate for a refrigerator, traffic, computer fan, or a reflective wall close behind the singer. Condenser microphones capture the voice and the acoustic environment together. If the room sounds obvious during a hand clap or spoken test, select a more suitable recording position or use a dynamic microphone before changing preamps.
When a dynamic microphone is better for vocals
A dynamic microphone can be the best studio microphone for vocals when the singer records in a bedroom, rehearsal space, or untreated office. The SM58 is a dependable cardioid option, while the MV7 provides the additional convenience of USB and a more studio-oriented close-talk design. Dynamic microphones generally capture less room ambience at a typical close working distance and tolerate strong vocal levels well.
The main compromise is sensitivity. You may need more interface gain, and a noisy or weak preamp can add hiss when the gain is pushed high. Choose an interface with a clean microphone input and keep the XLR cable run practical. Do not add a signal booster automatically; first confirm that the interface cannot provide a healthy recording level without excessive noise.
Pickup pattern matters as much as capsule type. Cardioid is the most useful general pattern because it prioritizes the front and rejects much of the rear. Supercardioid and hypercardioid designs can offer tighter front pickup, but they have a rear or side sensitivity area that must be positioned carefully. A multi-pattern microphone can switch between cardioid, figure-eight, and omnidirectional modes, but those extra patterns are useful only if the room and recording method justify them.
For a basic XLR vocal setup, allow roughly $250 to $450 for an AT2020 or SM58, an entry-level interface, an XLR cable, headphones, a stand, and a pop filter. An NT1 setup commonly falls around $400 to $650, depending on the microphone version and accessories. These are planning ranges rather than fixed prices, but they show why the microphone price alone is not the setup cost.
Compare the best recording microphones: USB and XLR, interface needs, monitoring, noise, and total cost
The best recording microphones are the ones that deliver a clean signal through a connection path suited to the session. USB is convenient and often inexpensive. XLR is more flexible for multi-microphone recording, hardware monitoring, gain control, and future upgrades. Neither connection guarantees better sound by itself.
USB and XLR connection paths
- USB microphone: the microphone contains a preamp and analog-to-digital converter. Connect it to a computer, install any required software, and monitor through the microphone’s headphone output if available.
- XLR microphone: the microphone sends an analog signal to an audio interface or mixer. The interface supplies gain, converts the signal, connects to the computer, and usually provides direct headphone monitoring.
- USB/XLR hybrid microphone: offers a simple computer connection and a later path into an interface. The MV7, Q2U, and ATR2100x-USB are examples of dynamic hybrids; some condenser models also offer both outputs.
USB is usually the better first path for one-person streaming, video calls, voice-over, or a portable desk. It keeps the number of boxes and cables low. Its limits appear when you need several microphones, external preamps, hardware outboard gear, multiple headphone mixes, or a more modular studio.
XLR is usually the better path for vocal recording, instruments, multiple performers, and a setup designed to grow. An interface can accept more than one microphone, provide 48-volt phantom power for condensers, and let you replace the microphone without replacing the entire digital connection system.
Monitoring and latency
Monitoring lets you hear what the microphone is actually sending. Direct monitoring through a USB microphone or interface is preferable for spoken-word work and singing because it avoids the delay created by software processing. A small delay can make a singer change timing or make a speaker feel disconnected from their own voice.
Use closed-back headphones while recording so the backing track does not leak heavily into the microphone. Keep the headphone level loud enough for timing but low enough that you can judge the natural balance of the voice. Open-back headphones can be useful for editing and mixing, but they are more likely to leak into a sensitive condenser during recording.
Some USB microphones provide a headphone jack with a blend control between computer playback and direct microphone signal. This is useful for streaming because you can balance your voice against game, music, or call audio. An interface offers similar monitoring options, sometimes with more routing flexibility.
Self-noise, room noise, and gain
Self-noise is the low-level noise generated by the microphone’s electronics. It becomes most important when recording quiet vocals, distant sources, or heavily compressed material. A low-self-noise condenser such as the NT1 can preserve quiet detail, provided the room itself is quiet.
Room noise comes from fans, traffic, appliances, voices, and reflections. A microphone with low self-noise can still produce a noisy recording if it captures a loud room. Dynamic microphones often make room control easier because they are commonly used close to the source, but they are not immune to noise. Position and distance remain critical.
Interface or USB gain should be high enough to create a strong recording without clipping. Record at 24-bit when available and leave headroom for louder phrases rather than trying to make the waveform fill the entire meter. Digital clipping is harsh and cannot be repaired reliably after recording.
Total setup cost and upgrade path
Compare complete signal chains rather than microphone prices:
- Lowest-cost USB path: Q2U or ATR2100x-USB, headphones, stand, and USB cable. Expect approximately $100 to $280.
- Simple USB condenser path: Wave:3 or a comparable USB condenser, headphones, and a stand or arm. Expect approximately $200 to $350.
- Entry XLR condenser path: AT2020, two-meter XLR cable, interface with phantom power, headphones, stand, and pop filter. Expect approximately $250 to $450.
- Low-noise XLR vocal path: NT1, interface, XLR cable, headphones, stand, and pop filter. Expect approximately $400 to $650.
- Hybrid upgrade path: MV7, Q2U, or ATR2100x-USB used first over USB, then connected to an interface later. The initial cost is higher than a fixed USB microphone, but the microphone remains usable after the rest of the system changes.
Include the stand or boom arm in the budget. A microphone placed on the desk can pick up keyboard vibrations and handling noise, while a poorly positioned microphone encourages inconsistent distance. Also include a pop filter for a condenser vocal setup and headphones for monitoring. A computer alone is not a complete recording chain.
Test the complete signal chain with repeatable spoken-word and vocal takes
Test the microphone in the room and connection path where you will actually use it. A specification sheet cannot show whether the room sounds hollow, whether the interface adds hiss at the required gain, or whether the performer can maintain a consistent distance.
Set up the spoken-word test
- Choose the final position. Put the microphone where it will be used, not in the most flattering temporary location. Turn off avoidable fans and appliances, close doors and windows, and leave the normal desk, monitor, and room surfaces in place.
- Match the microphone distance. Test a dynamic microphone at approximately 5 to 10 cm and a condenser at approximately 10 to 20 cm. Use a pop filter or windscreen. Keep the microphone slightly off-axis if plosives are strong.
- Set the connection. Connect a USB microphone directly to the computer, or connect an XLR microphone to an interface with phantom power enabled only when the microphone requires it. Plug headphones into the microphone or interface, not the computer, when direct monitoring is available.
- Set conservative gain. Speak at the loudness you expect during a stream or recording. Adjust gain so normal peaks have clear headroom and the loudest words do not clip. Do not compare one microphone at a much louder monitoring level than another.
- Record the same passage. Read 20 to 30 seconds containing quiet words, ordinary speech, “p,” “b,” “t,” and “s” sounds. Add a few louder phrases. Keep the speaker, distance, room, and software settings unchanged.
- Record silence. Capture at least 10 seconds with nobody speaking. Listen for steady electronic hiss, computer noise, hum, intermittent clicks, and room reflections.
Evaluate the spoken takes at the same playback volume. A successful result has clear consonants, stable volume, no clipped peaks, manageable plosives, and a background that does not distract during pauses. Failure cues include a hollow room sound, harsh sibilance, audible keyboard or fan noise, bass changes caused by inconsistent distance, and hiss that becomes obvious when the voice is compressed.
Run a vocal comparison
- Use the same performance. Sing one verse or a 30-second section with quiet, medium, and loud phrases. If possible, record each microphone without changing the singer’s position or backing track.
- Check the loudest note first. Confirm that the microphone, USB input, or interface does not clip. A condenser may require less gain than a dynamic microphone, so set each input independently while keeping the recorded peak level comparable.
- Compare room balance. Listen between phrases and at the ends of sustained notes. A condenser that sounds impressive on the first phrase may capture too much wall reflection or computer noise in the complete take.
- Check plosives and sibilance. Listen for bursts on low consonants and sharp “s” sounds. Adjust angle and distance before using heavy processing. A small position change can solve a problem more naturally than aggressive equalization.
- Test monitoring comfort. Have the singer monitor the backing track and voice for several minutes. If latency, headphone bleed, or an uncomfortable level affects the performance, the connection path is not ready even if the raw recording sounds clean.
A suitable vocal microphone produces a take that stays intelligible when quiet phrases are raised and loud phrases are controlled. It should not force the singer into an unnatural position, and the room should remain quieter than the performance. If the condenser sounds detailed but the room is prominent, move to a better-treated position or test the SM58 or MV7. If the dynamic sounds controlled but lacks the desired high-frequency detail, try the AT2020 or NT1 after improving the room and monitoring path.
For streaming, repeat the test while running the actual game, call, or screen-capture software. Check that the microphone input, headphone monitoring, and application output are routed separately and that the microphone remains clear when other audio is active. For recording, repeat the test with the same interface gain, sample settings, headphones, and room treatment used for the final session. The microphone and signal chain that produce the cleanest, easiest performance are the practical choice.