The best USB mics for voice acting depend more on your room and recording habits than on headline specifications. A dynamic USB microphone such as the Shure MV7+ or RØDE PodMic USB is usually the safer choice in an untreated or noisy room. A condenser such as the RØDE NT-USB+ or Audio-Technica AT2020USB-X can capture more air and detail when the room is quiet and acoustically controlled.
For a low-cost setup, the Samson Q2U and Audio-Technica ATR2100x-USB remain practical choices. They combine a close-working cardioid pickup with USB headphone monitoring and forgiving spoken-word performance. The best microphone for voice acting is the one that gives you a clean, consistent voice without forcing you to repair room noise, reflections, plosives, or monitoring problems in software.
Best USB mics for voice acting by room and budget
Best for a noisy or untreated room: Shure MV7+. This dynamic microphone is designed for close spoken-word recording and includes USB and XLR connections, a headphone output, and software-based processing options. Its directional pickup helps reduce sound arriving from behind and beside the microphone. The MV7+ suits voice actors recording near computers, hard walls, traffic noise, or household activity. It rewards a steady position around 5 to 10 cm from the grille and benefits from a pop filter or foam windscreen.
Best alternative for close, broadcast-style speech: RØDE PodMic USB. The PodMic USB has a full, focused sound that works well for narration, podcasts, character dialogue, and online voice work. Its integrated shock mounting and headphone output make it easier to build a compact setup. It is less forgiving of changes in mouth-to-mic distance than some condensers, so keep your delivery position consistent and angle the microphone slightly to reduce bursts of air.
Best budget option: Samson Q2U. The Q2U is a dynamic cardioid microphone with USB and XLR outputs, a headphone jack for direct monitoring, and simple controls. It does not offer the same refinement or processing flexibility as more expensive models, but it can produce clear spoken audio in a difficult room. The Audio-Technica ATR2100x-USB is a similarly useful alternative with a familiar close-mic sound.
Best for a quiet room and detailed narration: RØDE NT-USB+. This condenser microphone captures a more open, detailed top end than most budget dynamics. It is a good fit for audiobook narration, commercial reads, and character work recorded in a quiet room with soft furnishings or acoustic treatment. Its sensitivity is also its main limitation: it hears computer fans, traffic, reflections, and chair movement more readily than a close-working dynamic.
Best flexible condenser: Audio-Technica AT2020USB-X. This is a cardioid condenser with a clean, present sound and USB-C connectivity. It suits speakers who want more high-frequency detail and have enough room control to manage reflections. It includes a headphone output and direct monitoring, which are important for recording without distracting delay.
Best if you need multiple pickup patterns: Blue Yeti or a similar multi-pattern USB condenser. Multi-pattern models can switch between cardioid, omnidirectional, bidirectional, and stereo modes. Those options are useful for interviews or group recording, but voice acting normally calls for cardioid. Extra patterns do not compensate for a reflective room, and the large body can encourage poor stand placement. Choose one for flexibility, not because more patterns automatically mean better dialogue.
What a good USB microphone needs for spoken audio
A good USB microphone makes speech intelligible without exaggerated hiss, harsh consonants, or a hollow room sound. Voice acting also demands consistency. You may record multiple takes, change character voices, or edit sentences together, so the microphone should respond predictably when your delivery and position remain steady.
Clear midrange matters first. The vocal midrange carries consonants, words, and emotional detail. A microphone with impressive bass can make narration sound muddy, while excessive treble can emphasize sibilance in “s” and “sh” sounds. Listen for a natural voice rather than a dramatic sound that only seems impressive for a few seconds.
USB convenience should not remove useful controls. Look for a headphone output, a headphone-volume control, and a microphone gain control. A mute button can help during live sessions. USB-C is convenient, but also check whether the package includes the required cable and whether the microphone connects reliably to your computer, tablet, or phone.
Latency-free monitoring is essential. Direct monitoring routes your voice from the microphone to your headphones before the signal travels through recording software. This lets you hear your actual position and plosive control without the echo or delay caused by software monitoring. Some microphones blend the direct signal with computer playback; that mix control is useful when recording to a backing track or taking direction remotely.
Software compatibility should be simple. Most modern USB microphones are class-compliant and work with Windows and macOS without special drivers. Confirm compatibility with your intended device and software, such as Audacity, Reaper, Adobe Audition, GarageBand, or a remote recording application. A microphone may work for recording but still require separate setup for video calls, streaming software, or mobile devices. Manufacturer control software can add compression, equalization, or noise reduction, but the microphone should produce a usable unprocessed signal as well.
Room, pickup pattern, plosives, noise, and monitoring criteria
Room reflections often matter more than microphone frequency response. Hard walls, windows, desks, and ceilings reflect your voice back into the microphone. Those reflections create a boxy or distant quality that equalization cannot fully remove. Record facing a soft, irregular surface such as curtains, bookshelves, or acoustic panels. Do not place the microphone directly between two bare parallel walls, and avoid recording in the center of a very reflective room.
Pickup pattern determines what the microphone hears. Cardioid microphones are most sensitive at the front and reject more sound from the rear. Aim the front of the microphone toward your mouth and place the least sensitive rear side toward the main noise source. Supercardioid and hypercardioid designs can reject more sound from the sides, but they have narrower working angles and may pick up some sound from directly behind. Omnidirectional microphones hear the room more evenly and are rarely the first choice for solo voice acting in an untreated space.
Dynamic microphones are usually more forgiving; condensers are usually more revealing. A dynamic capsule tends to capture less distant room sound and can work well close to the speaker. It may need more gain, and quiet voices can expose the limitations of a weak audio interface or USB preamp. A condenser is generally more sensitive and detailed, but it requires better control of reflections, background noise, and microphone handling.
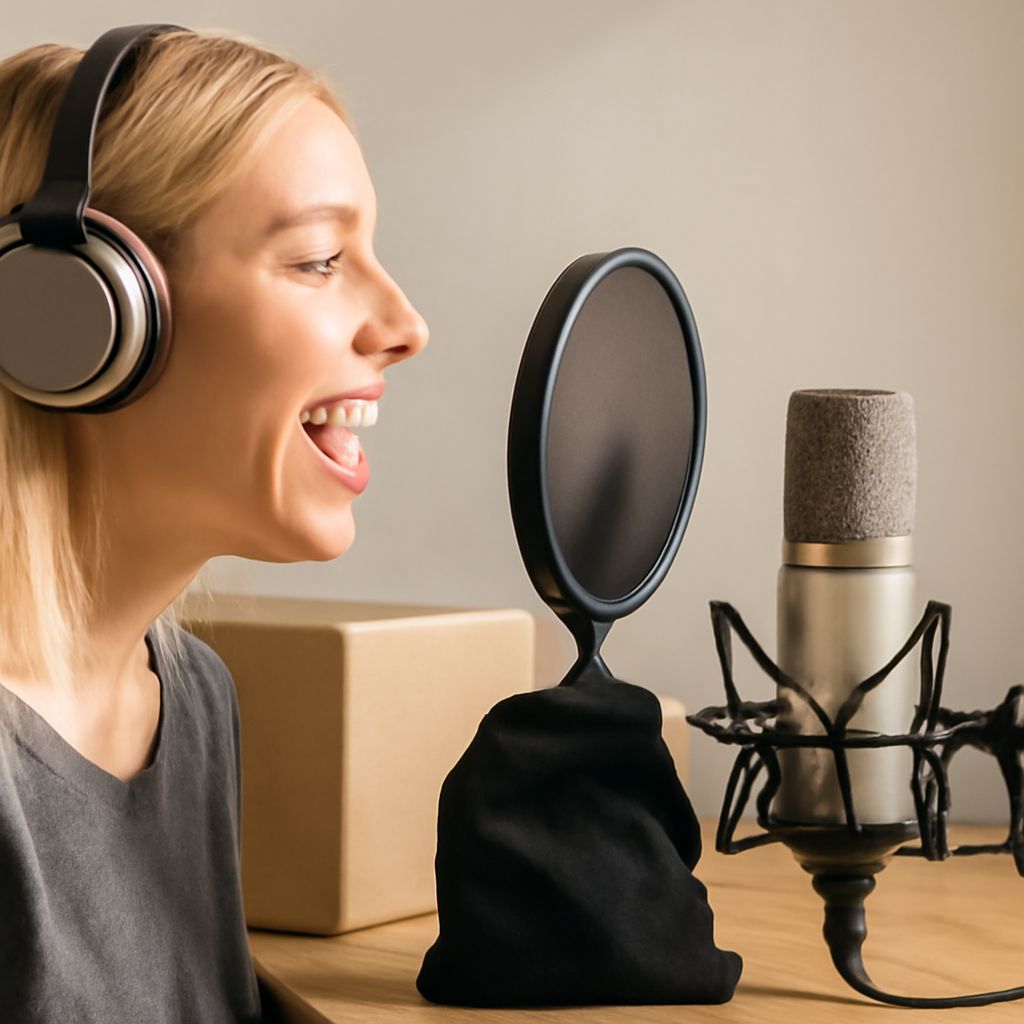
Plosives require position and physical control. “P,” “B,” and “T” sounds can create low-frequency blasts when air strikes the capsule. Place a pop filter roughly 5 cm in front of the microphone, then keep your mouth another 5 to 10 cm from the filter. Speaking slightly across the microphone rather than directly into it can also reduce bursts of air. A foam cover helps with light plosives but is not a substitute for a proper pop filter and stable technique.
Self-noise should remain inaudible in pauses. Self-noise is the hiss generated by the microphone’s electronics. It becomes more noticeable when you raise gain, record quiet passages, or apply heavy compression. Test the microphone with several seconds of silence at the intended gain. A computer fan or room hum can mask self-noise, so judge the recording in the actual space rather than relying only on specifications.
Stand position affects both sound and handling noise. Use a stable boom arm or weighted stand, and keep it off a desk that vibrates when you type or move. Position the microphone slightly below or beside your mouth if that gives a clean sightline to the script. Keep the capsule at a consistent distance throughout a take. Moving closer increases bass and level; moving away increases room sound and makes edits less consistent.
How to audition a USB microphone with your own voice
- Prepare the same conditions for every candidate. Record in the room where you will actually work. Turn off avoidable noise sources, use the same stand position, connect the same headphones, and select the same recording software and sample settings. Disable automatic gain control and software noise suppression during the first comparison.
- Set a practical starting position. Place each microphone on the same side of the desk, approximately 10 to 15 cm from your mouth, with a pop filter between you and the capsule. Aim a cardioid microphone correctly. Set gain so normal speech peaks comfortably below clipping, leaving roughly 12 dB of headroom for louder lines.
- Record one repeatable script. Use 30 to 45 seconds containing quiet narration, normal conversational lines, louder emphasis, and plosive-heavy words such as “Peter Piper picked a paper bag.” Include sibilant words such as “six soft shoes,” then leave five seconds of silence at the end. Read at the same distance and volume for every microphone.
- Test movement and direction. Record the script once facing the microphone, once turned about 30 degrees to the side, and once from a few centimeters farther away. A useful voice-acting microphone should remain intelligible without making small movements sound like major tonal changes. Excessive bass changes indicate proximity-effect sensitivity or inconsistent positioning.
- Listen for the practical failures. In headphones, check for room echo, computer noise, hiss in the silent section, harsh “S” sounds, dull consonants, plosives, and handling bumps. Listen to the unprocessed files at matched loudness; the louder recording will otherwise seem better. Check whether direct monitoring is clear and free from distracting delay.
- Test your real software workflow. Arm the microphone in your intended DAW or recording application, monitor through the microphone’s headphone output, and perform a short edit. Confirm that the software receives the correct input, playback does not route back into the recording, and the microphone remains stable after reconnecting the USB cable.
Choose the microphone that gives the cleanest words and least room sound in your real space, not the one with the most impressive isolated specification. A dynamic model is the safer starting point for noisy rooms; a condenser becomes the stronger choice when quiet conditions and room treatment let its added detail work in your favor.